
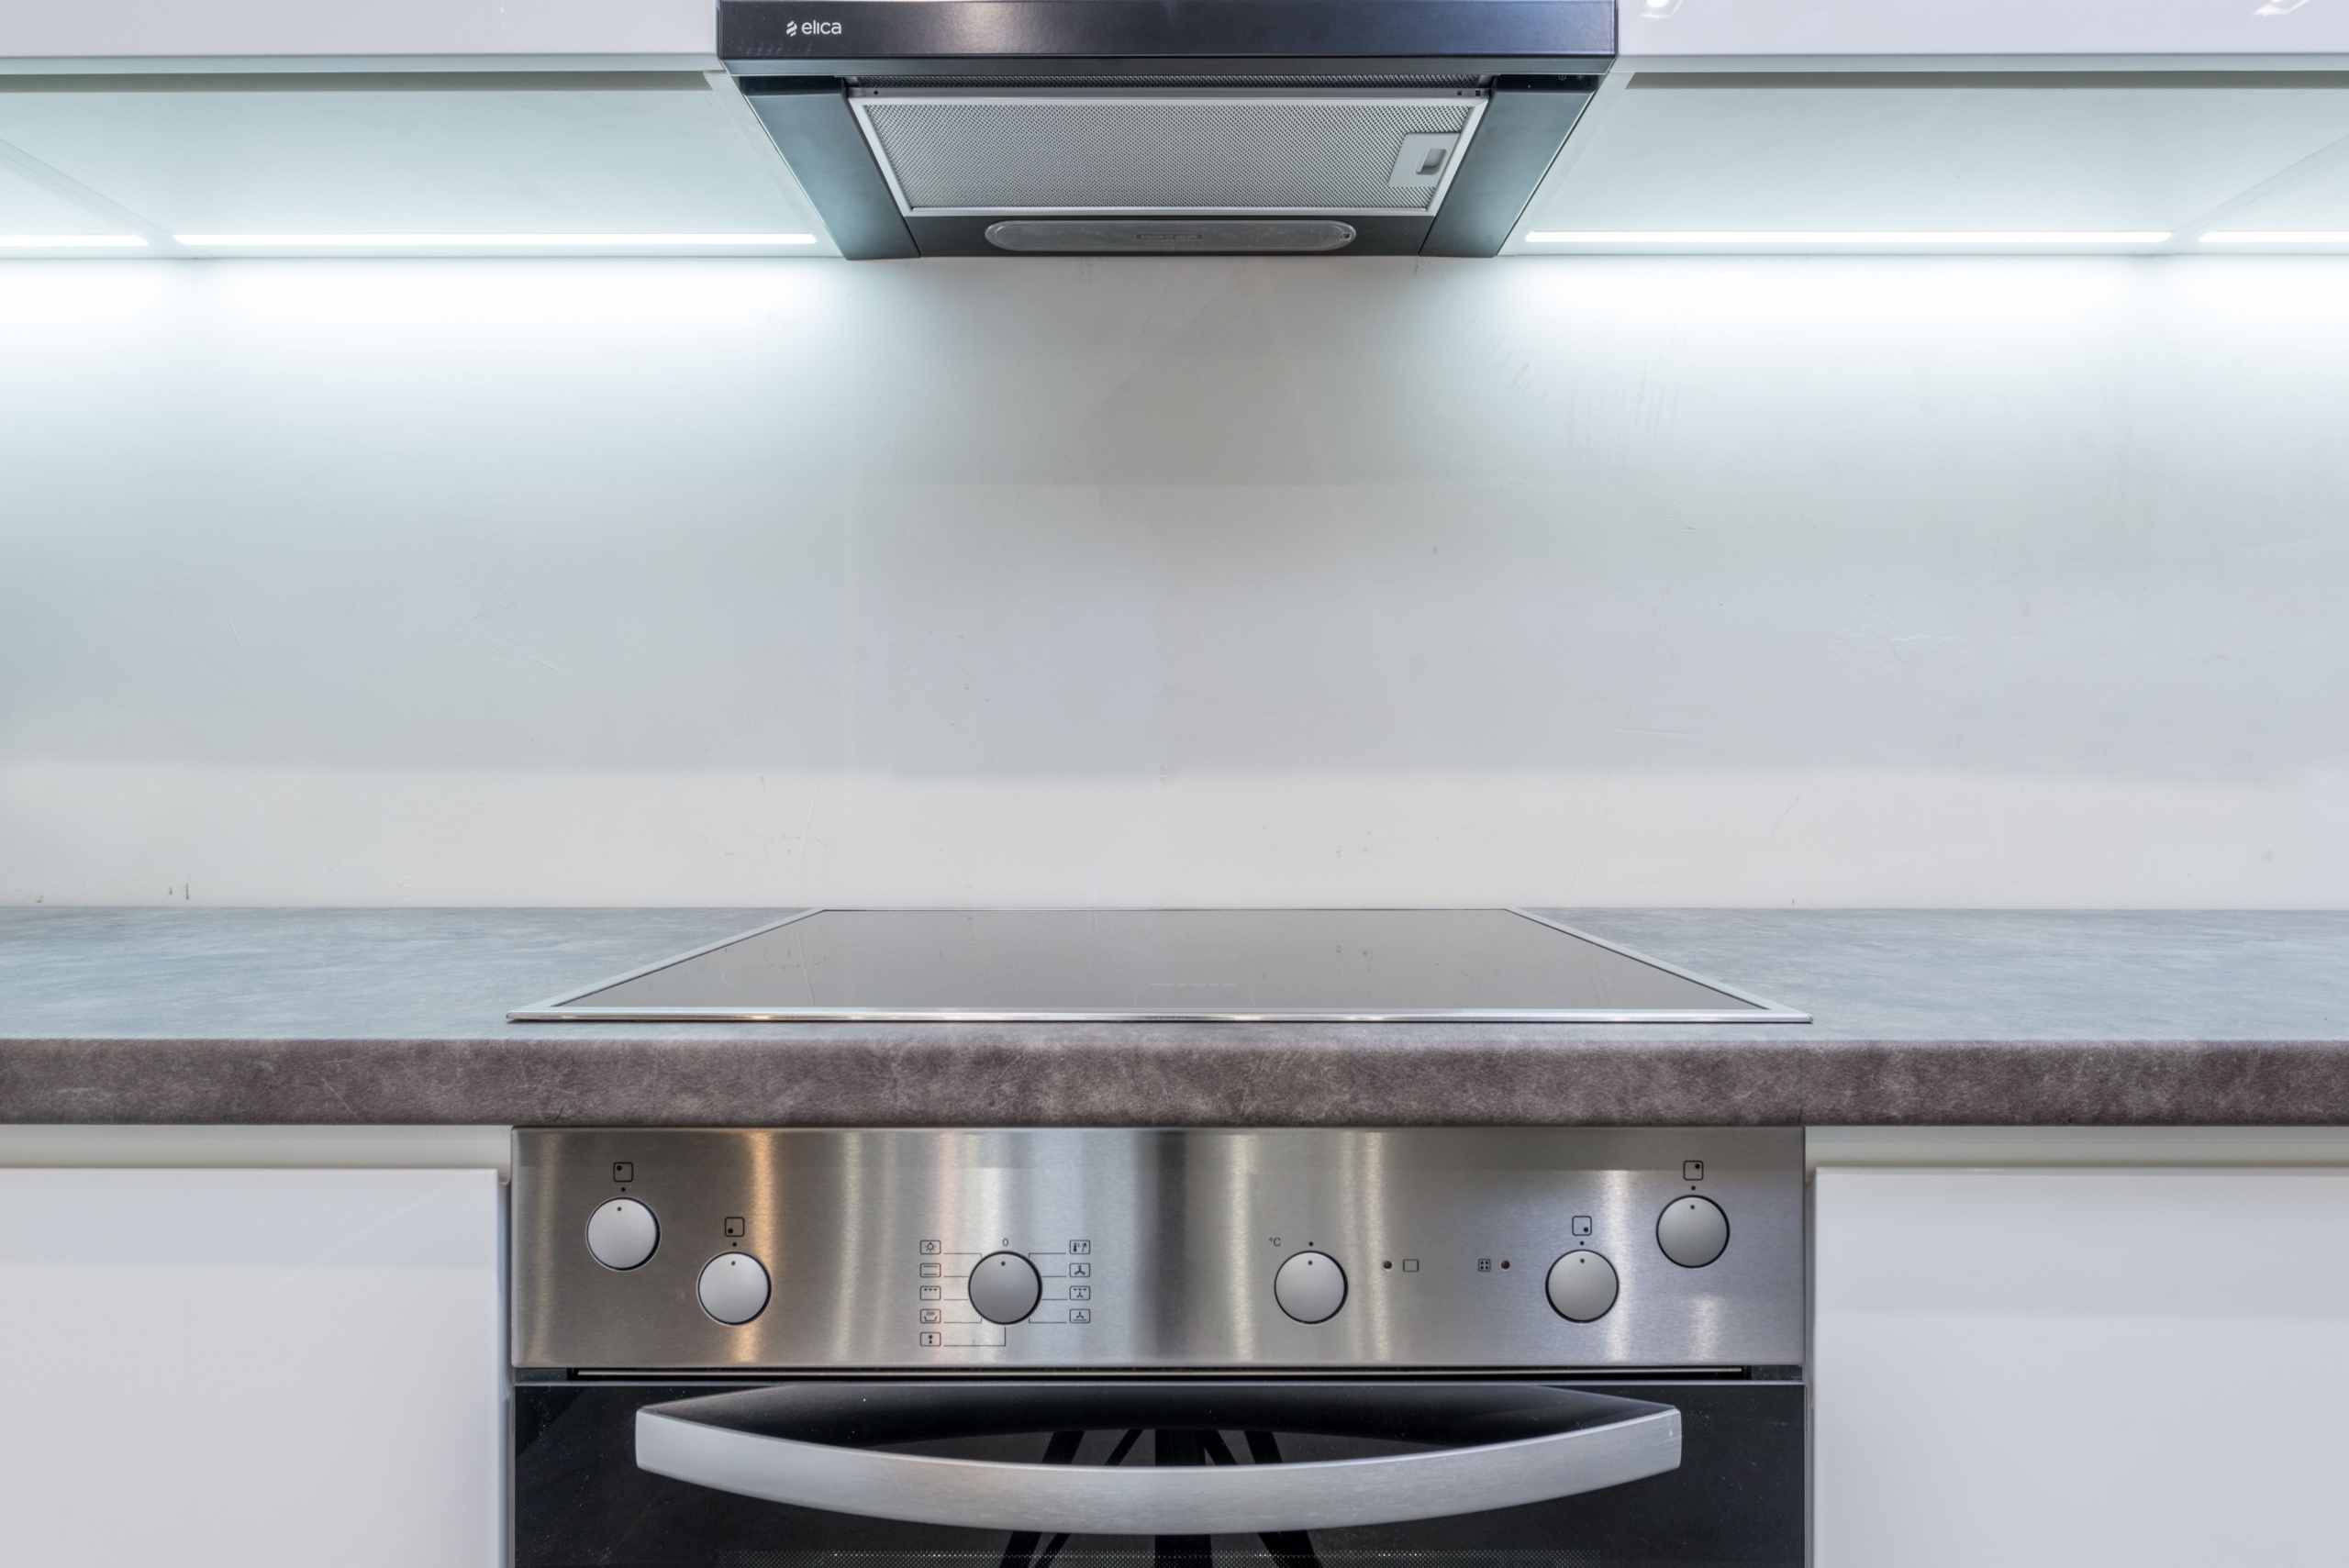
Built-in appliances look really nice, like the one in the featured image that I found on a stock photo site. The main complexity in replacing these is you need remove them from the cabinets and countertops they’re installed into. In the case of a built-in cooktop above a built-in oven, you need to uninstall and then re-install the oven first, which essentially means uninstalling and installing two appliances.
Choosing a new unit
When shopping for a new unit, you have the option to get the same one, a similar model from the same brand, or something completely different.
One of the key decisions to choosing a new unit is your countertop’s cut-out size:
- Cut-out: The countertop cut-out is the hole that is cut into your countertop explicitly to fit the current unit. This is also the hole that the new unit must fit.
For me this was the deciding factor. Until removing the unit, you won’t know the exact measurements of the cut-out, so what I did is looked up my current model’s instruction manual to find the cut-out size maximum and minimum values. To make a safe decision, I wanted to make sure the new unit’s cut-out size requirements were within range of the existing unit’s. Unfortunately, this severely limited my options. Some options that I didn’t feel comfortable with:
- ❌ Modifying the cut-out size: I wasn’t prepared to cut into the current countertop out of risk of damaging it or the surrounding cabinets. I also don’t have the tools to do this safely.
- ❌ Trying to jam something into a hole that is too small: I figured that this could risk damaging the appliance or not providing the appropriate clearance required.
- ❌ Trying to add supports to over-compensate for a hole that is too big for the new unit: I didn’t want to try to figure out how to properly support a smaller unit. I feel parts of the hole could be visible or it wouldn’t have the appropriate support needed, and then having to add supporting pieces is not something I wanted to do.
For me, I tend to approach projects in a way to minimize risk. This is true in my software development life, as well as in my trades-related life. For this reason, ensuring a suitable cut-out size was the most important factor for this project to ensure the least amount of risk.
I will, however, mention that there are people in my building that have a different level of risk tolerance than me and have had success with replacing their broken cooktop with a different brand whose cut-out size would have, mathematically, been incompatible with the recommended cut-out size of the existing unit. There are some more budget brands out there whose cut-out sizes would not be compatible based on the measurements they recommend. It is, however, possible to disregard the recommendations and try to make it work. I prefer to err on the side of caution rather than YOLO it with a unit that mathematically did not pass the acceptance criteria, however, if price is the most important thing, you may opt to consider a unit whose cut-out size recommendations vary from the cut-out size of your existing unit.
Considering I would like to work in the trades in the future, I would be quite embarrassed if I told a customer “it’s fiiiiine, just get the cheaper one” and then later have them have to go back to the store to try to return it. There may be a restocking fee for such an expensive item, which would result in costing the customer more money, and that would be a cost I either ask them to incur or that I take-on as the cost of doing business and making a poor decision.
Physically removing the old unit
Depending on where the built-in cooktop is installed, you may also have to remove a built-in oven since in many cases, built-in cooktops are installed above built-in ovens.
Removing the wall oven
Built-in ovens sit on top of the cabinetry and are secured to said cabinetry on the front face frame, typically in the stiles using screws. Stiles are the part of the face frame that runs vertically, which I learned watching cabinet-making videos.
So, I needed to unscrew the supporting screws in order to be able to pull the wall oven out. I had some help with this task. We pulled it out and kept it on a furniture dolly. We did not disconnect the electrical and worked around it.
Removing the cooktop
Now that the wall oven was out of the way and I could get to the cooktop, there are some screws underneath it that you unscrew. These are used to clamp the cooktop to the countertop. Remove these. After they’re removed, you should be able to push up from underneath of the cooktop. It will need a bit of force since there is also adhesive that is affixing the cooktop to the countertop. After removing the cooktop, you could leave it resting in the cabinet.
Cleaning up the installation surface and surrounding space
It was important to me to ensure that the install went successful that the area was clean. The idea of installing an appliance on top of and in front of crispy burnt food bits wasn’t appealing to me, so I took my shop vac and vacuumed up all the burnt food debris. I’m honestly not sure where that came from—did it shoot out from the oven fans?
The cooktop uses an adhesive strip on the surface of the countertop so I wanted to remove the old adhesive. For this task, I used some dish soap, a sponge, and a razor blade scraper tool. The new cooktop came with one of these too but it’s quite rudimentary and required a screwdriver to open and close the safety, whereas I already had one that I liked using more so I just used the one I already had. It’s important that there isn’t any debris so that the new adhesive strip has the most contact possible with the countertop to maximize its ability to adhere.
In summary, these are the cleanup tasks:
- Vacuum the cabinet area
- Remove the existing adhesive strip residue using soap, water, a sponge, and a razor blade
I think cleaning up shows professionalism and good workmanship. Being a handywoman that brings a shop vac for an appliance install would look really good, in my opinion. A lot of people care about the details. After the cleanup, we’re ready to address the next steps.
The electrical
One of the key differences between built-in appliances and regular ones is that they are hard-wired into the electrical. This is more complex (and maybe scary) than just plugging something into in an electrical receptacle. There isn’t much we need to worry about here since there was an existing unit and suitable junction box for this connection, but if you’re doing a kitchen renovation, you’d have to add this.
Turning off the circuit breaker
The most important step before beginning any project that touches electrical is to turn off the breaker. In professional settings, electricians and other tradespeople use lockout devices that are affixed to the breaker to ensure that the breaker cannot be switched back into the on position—either purposely or accidentally—without cutting off the lock. I don’t have these devices (yet) and I’m just at home with a friend who was helping out, so turning off the breaker is sufficient.
Electric panels usually have a legend that tells you what each breaker corresponds to. In the case of most cooktops and wall ovens, they will use double-pole breakers, which is essentially a breaker that takes up two slots. My cooktop uses a 30-amp circuit, and my wall oven uses a 15-amp circuit. Both of these need to be turned off to work with safely.
It was also interesting to look at the panel and see that my laundry washing machine only needs a 15-amp circuit to work but my dryer needs a 30-amp circuit, just like the cooktop. I also didn’t know that cooktops require more amperage than ovens, so that was neat to learn, but it makes sense if you think about it—4 burners boiling water at the same time probably require more electricity than an oven. If learning about electrical panels is interesting, you might also find this post interesting where I talk more in-depth about my electrical panel.
The image below is of my electrical panel and I’ve highlighted the cooktop and wall oven in the legend as well as on the panel. It’s just a matter of counting the breakers while following the legend, or reading the very feint numbers embossed into the panel (which I didn’t notice initially).
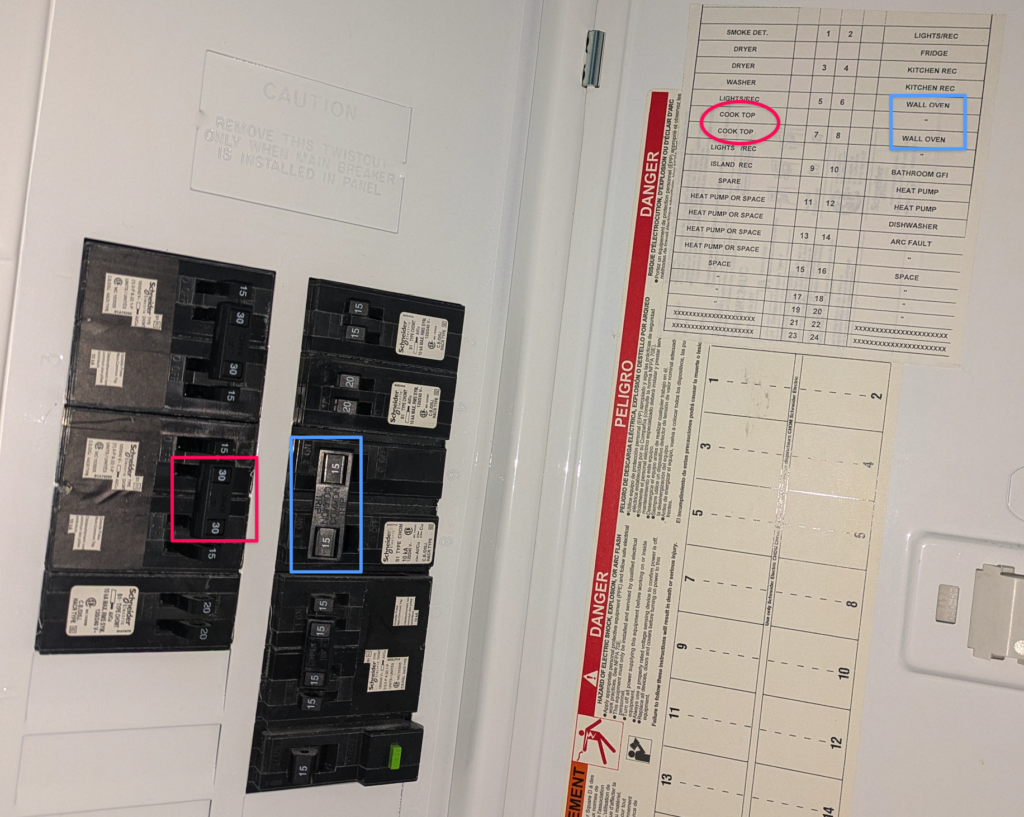
Circuit breaker highlighting the breakers for the cooktop, a double-pole breaker that takes up 2 slots and delivers 30amps to support 240-volt appliances (pink, to the left). The wall oven is also highlighted (blue, to the right), and also uses a double-pole breaker that takes up 2 slots and delivers 15amps to support 240-volt appliances.
As I mentioned earlier in this post, I didn’t have to fully disconnect the electrical wiring of the oven because the conduit was long enough to have the oven sit on a furniture dolly and move it around.
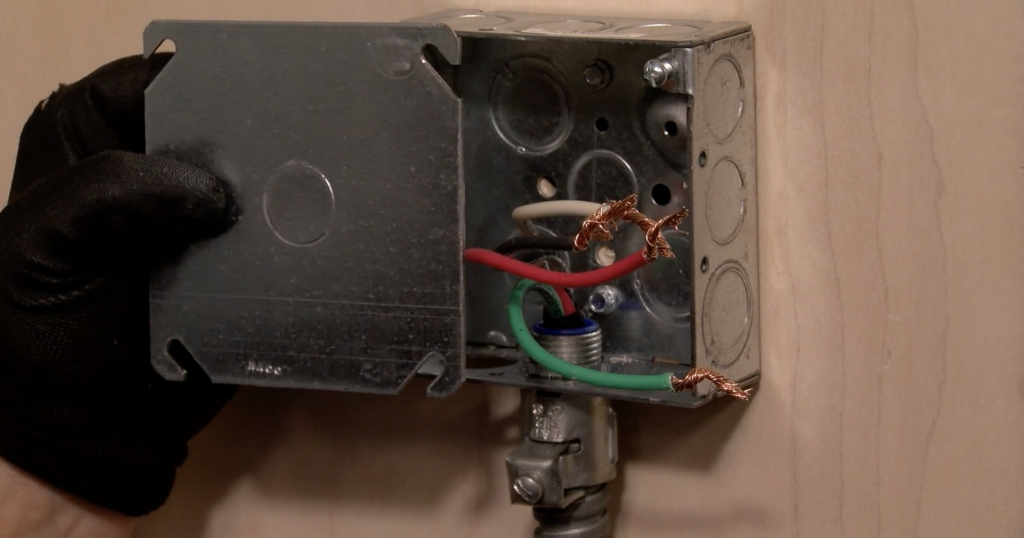
Junction box for wall oven or built-in cooktop
Depending on if you have a wall oven in the same spot or just the cooktop, your junction box may look different and have 2 conduits running to the box instead of just 1 like the image above.
-
- Black wire: Hot wire, delivering 120 volts
- Red wire: Hot wire, delivering another 120 volts
- White wire: Neutral wire, delivers current back to the panel
- Green wire: Ground wire (can also be bare copper)
The main thing is to pay attention to the existing wiring of the appliances when removing them so that you can connect the new one the exact same way. The connectors used are often wire nuts. Cooktops can come with 3-wire or 4-wire connections, and the instruction manual should include instructions for how to connect to both 3-wire branch circuit or a 4-wire branch circuit (pictured above).
Summary of steps taken
This blog post is grouped by topic, but the steps taken were not in the same order. This is the order of operations taken for this project:
- Turn off the breakers for both the wall oven and the cooktop
- Physically remove the wall oven. Do not touch the wiring. Set the oven on a furniture dolly so we can wheel it out of the way to work (thankfully the conduit and wiring were long enough for this)
- Clean up the cabinet area with a vacuum to remove burnt food debris
- Physically remove the cooktop and set it down in the cabinet since it’s heavy. Disconnect the wiring, remembering how the connections were made
- Clean up the countertop area using soap, water, and a razor
- Read and follow the instructions for the new cooktop
- Follow the physical installation instructions
- Follow the electrical installation instructions