
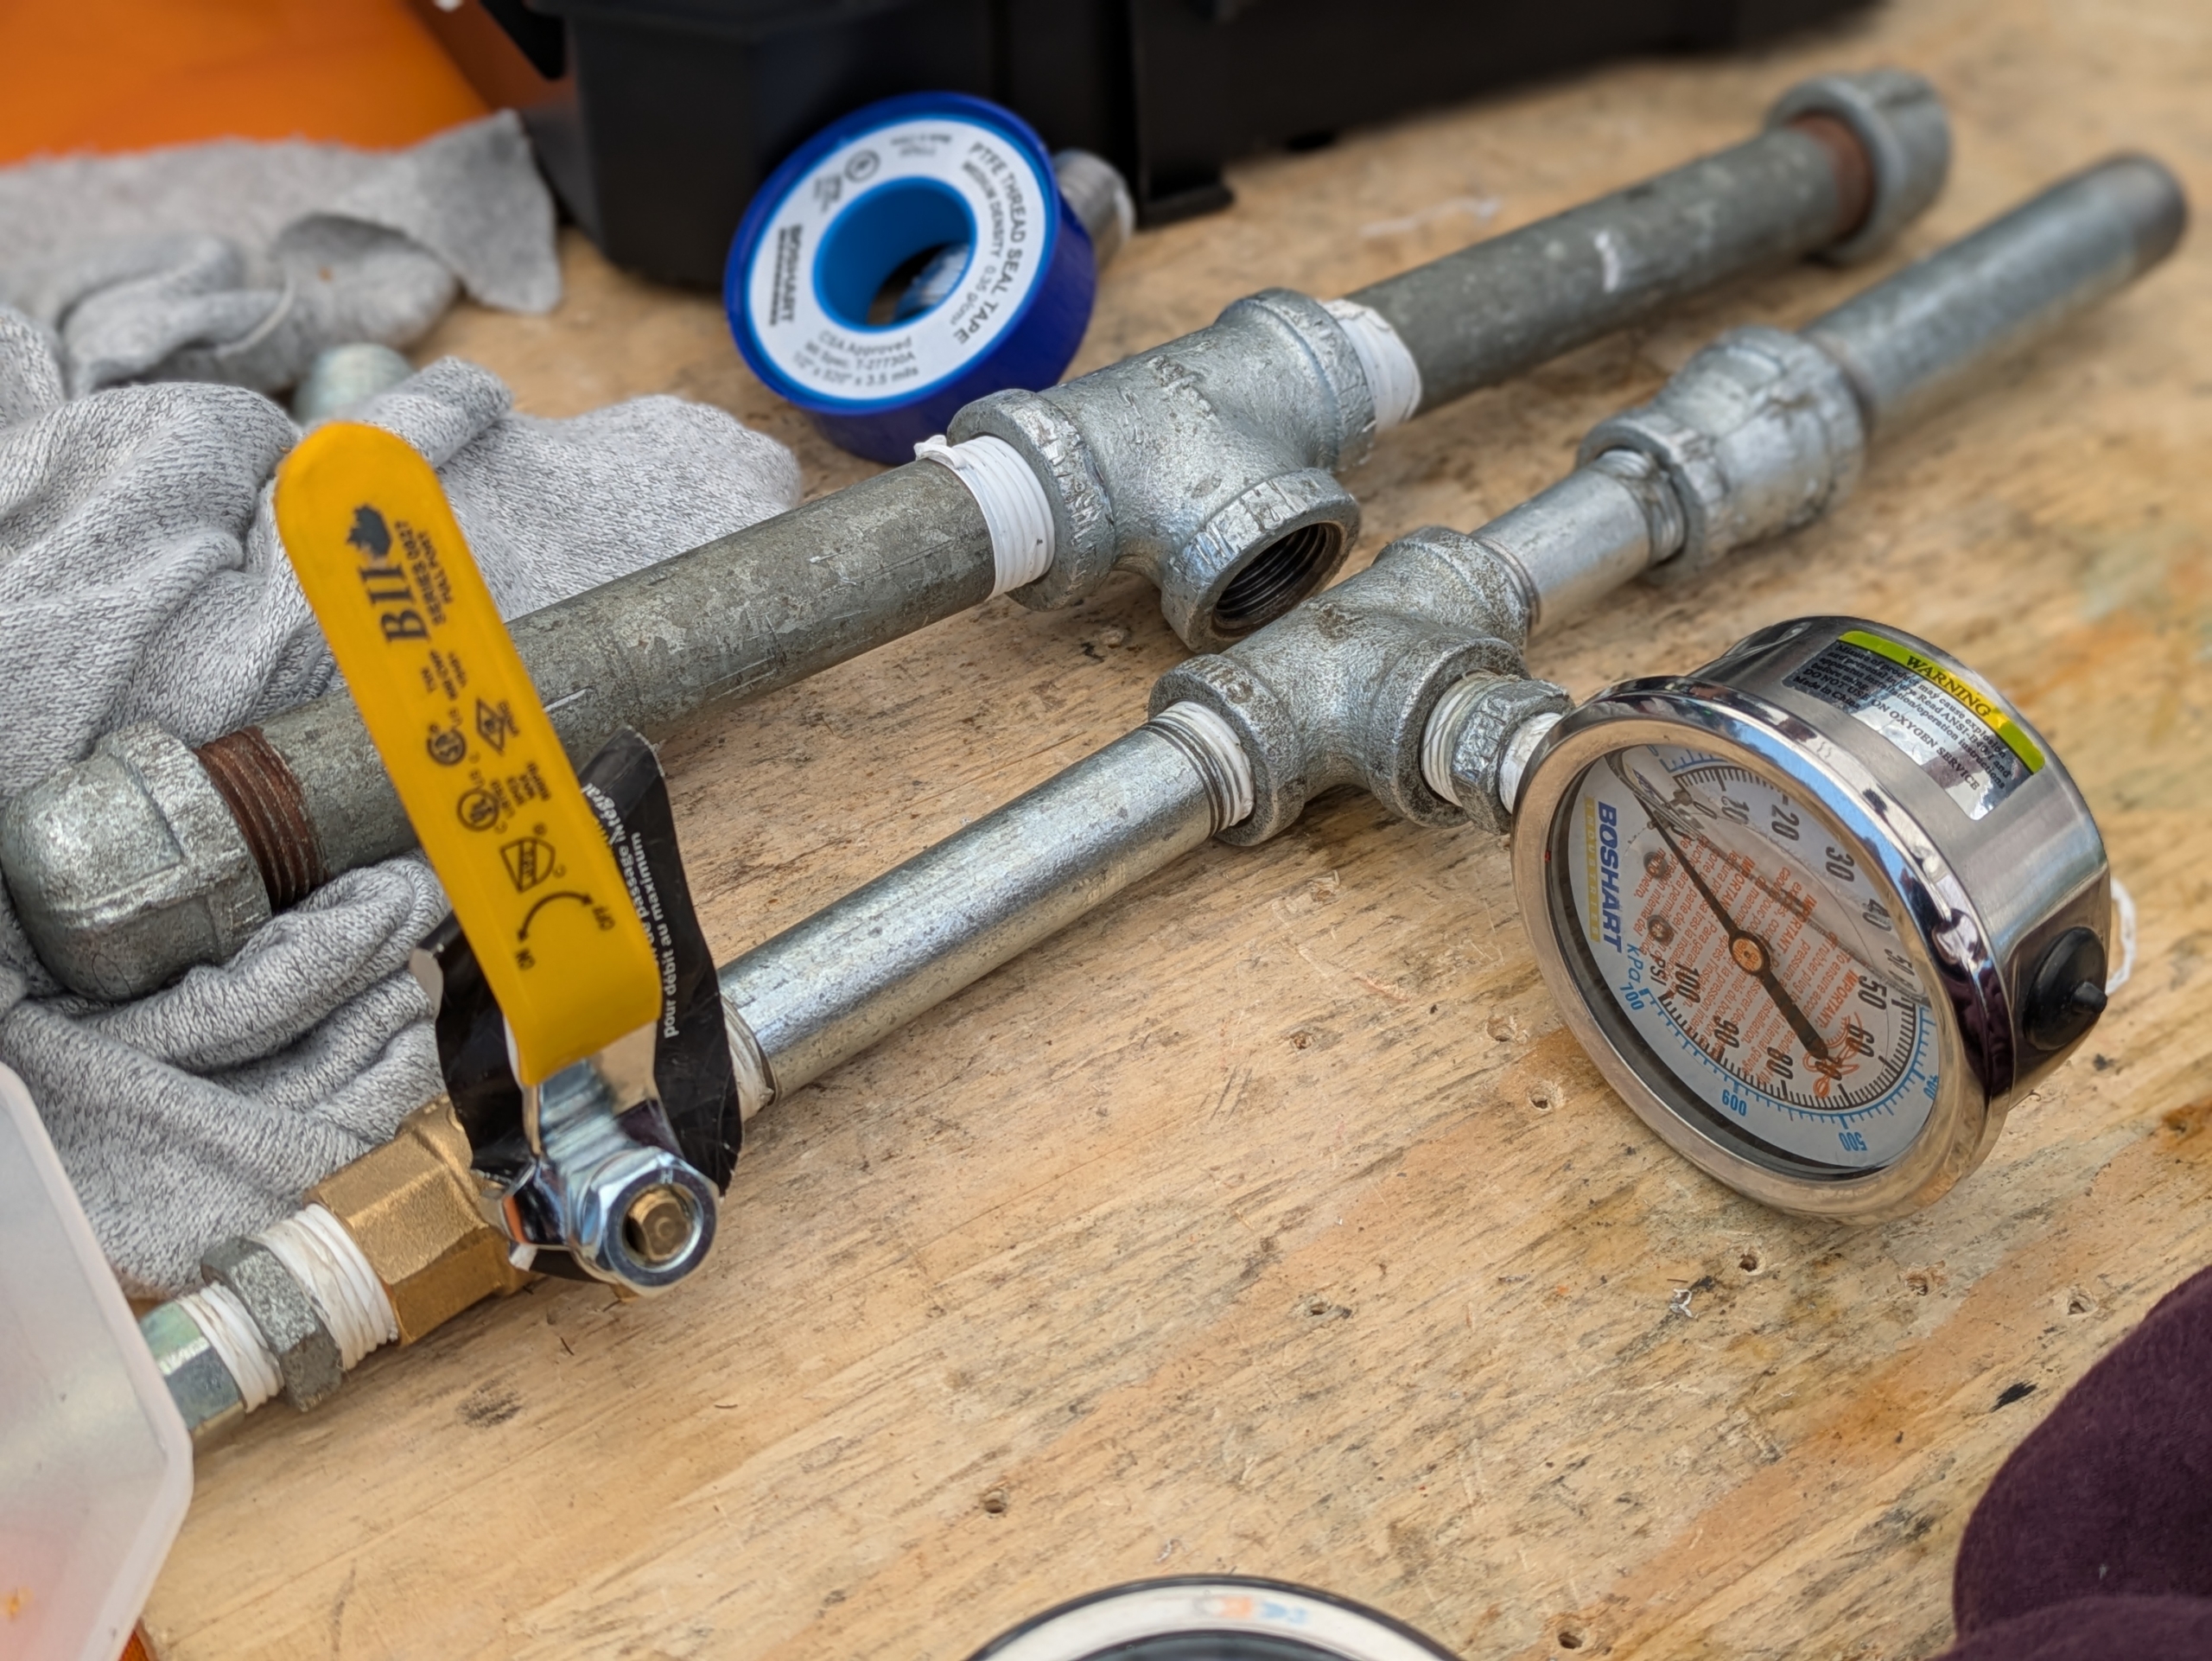
At the Tools in the Trades Bootcamp hosted at IDEAL Electrical, one of the skills that we learned was how to work with galvanized pipe and ensure a strong seal at the joints using PTFE thread seal tape (sometimes referred to as teflon tape). Our installations were tested to check for air leaks.
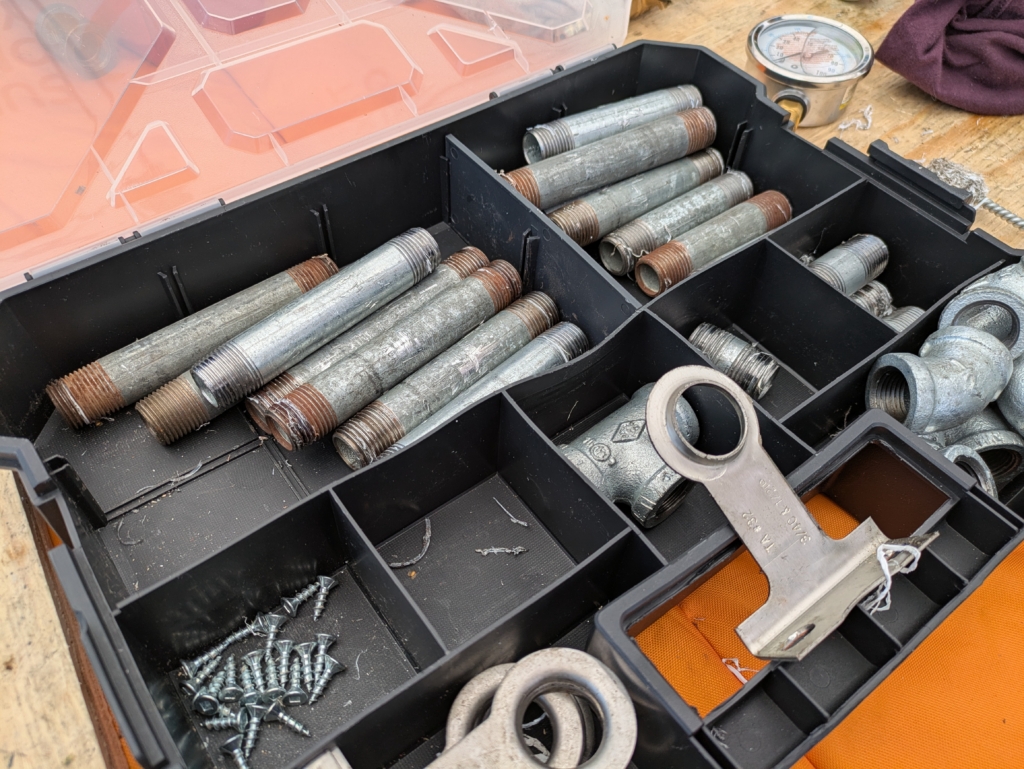
Various galvanized steel parts
Our challenge was to pick some parts, join them with PTFE tape and pipe wrenches, and then test our installation for air leaks.
Tightening the seal
First, it’s important to wrap the seal tape in the correct direction to ensure that it stays on when you screw on the joining piece. This means that it must be wrapped in a clockwise direction since the joint will be screwed on in that same clockwise direction.
Then, after it’s too tight to continue tightening by hand, you need to use two pipe wrenches to tighten it.
For my project, I created a U-shape, with one end of the U capped, and the other end open to be connected to the air compressor and pressure gauge.
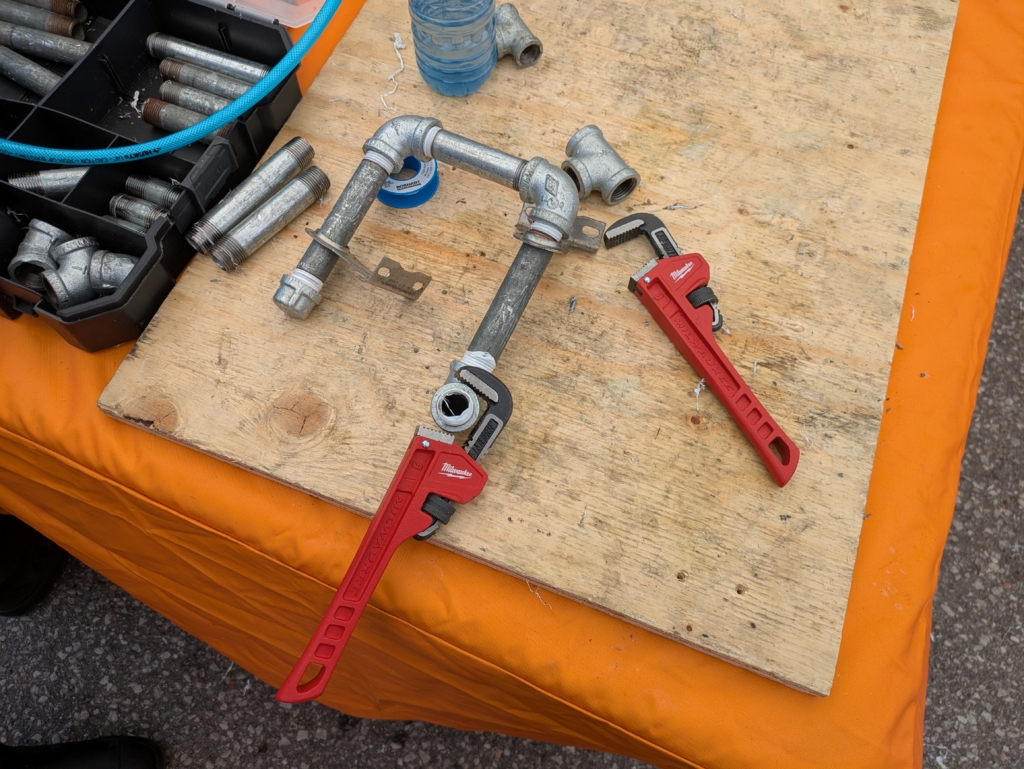
Two Milwaukee pipe wrenches used for tightening my installation
There’s definitely some skill required to tighten pipes using wrenches like this. At first, it looks like a simple task, but the positioning of each wrench on the pipes, as well as relative to each other, is important:
- The wrenches must face each other in opposite positions
- You can optimize tightening several joints at a time by putting the wrenches in the correct places
Tighten 2 joints at once!
I did find it pretty cool how you can tighten a middle joint at the same time as tightening an outer joint.
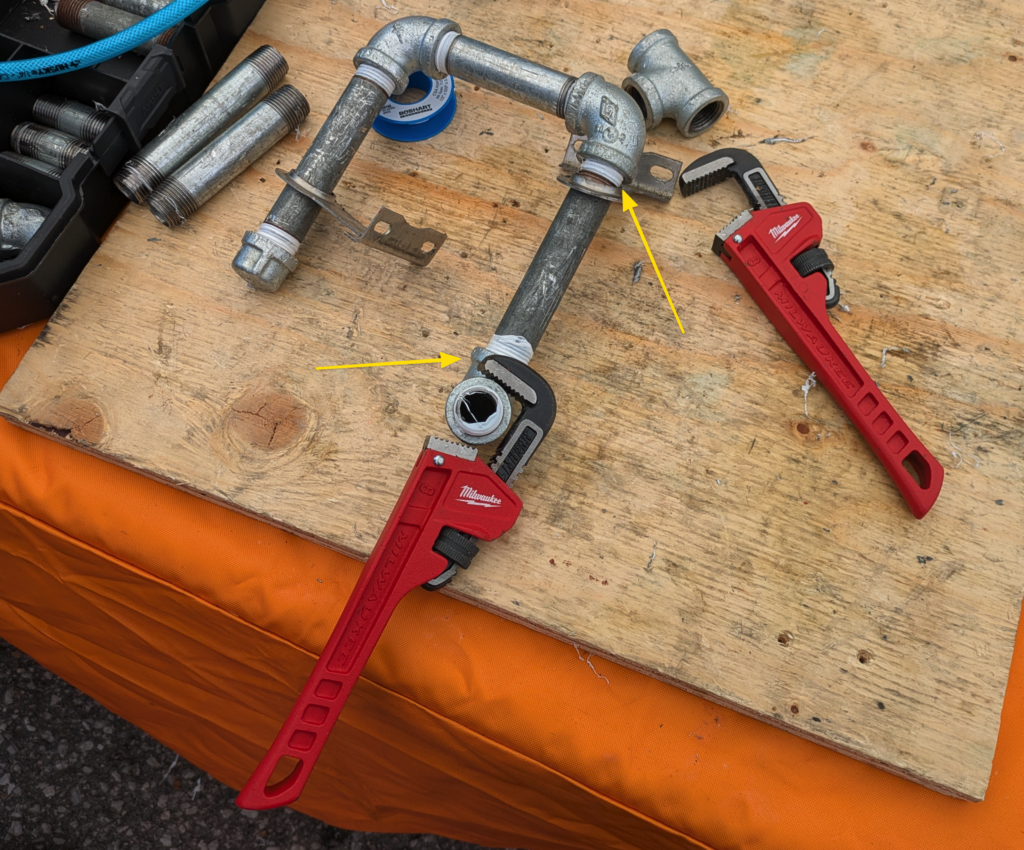
The two joints that can be tightened at the same time are indicated with yellow arrows: one top side of the U-shape, and the 90° joint directly below that one
In the above photo marked with 2 yellow arrows, you can see the two joints that can be tightened simulataneously:
- The joint with the 90° connector at the top of the U
- The joint with the 90° connector at the other end of that pipe that joins the bottom part of the U shape
By holding the first one and spinning the second, you can tighten both of those joints.
Pressure testing
After we were done building our randomly-shaped galvanized pipe installation, we had the opportunity to pressure test it with compressed air. This gave us the opportunity to see if our seals were good.
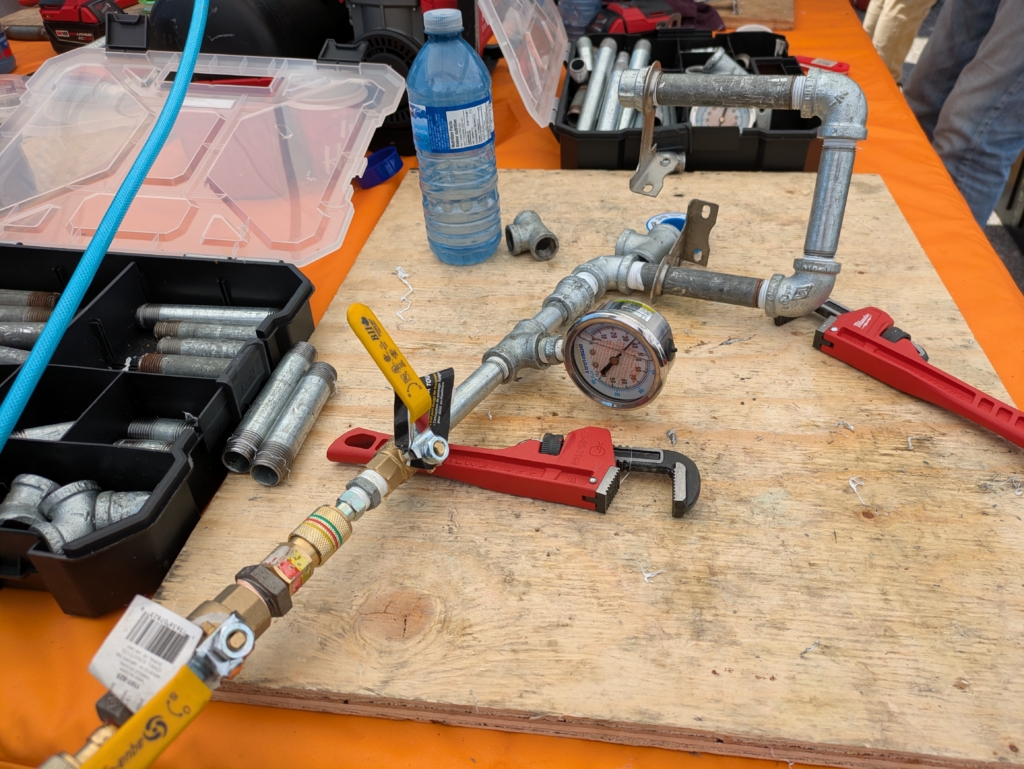
My project being tested with compressed air
During the test, the PSI went above 40psi but this is when I took the picture. This looks like before the test was performed as the valve closest to my project is closed. I probably should’ve gotten a picture of the gauge while it was being tested… oh well, you’ll have to trust me that it passed!
Here are the following seals I made:
- The seal closest to the pressure gauge, where I attached the galvanized pipe that has the gauge on it to the 90° elbow on one end of the U
- Each elbow (and I have three) has 2 seals on it
- A final seal at the end where my installation is capped
You’ll notice there are also pipe holding mechanisms on my pipe too, and that’s to simulate the experience that these pipes will also need to be installed onto something. Those holders will get screwed into some material, e.g. brick or concrete.
To test, I did the following:
- Ensure all the valves are in the closed position
- Added seal tape to connect the testing apparatus
- Tightened the seal with pipe wrenches
- Turn on the compressed air
- Open the valves
- Ensure a PSI reading above 30psi is possible
If I was following everything correctly, I think those were the steps to ensure the installation passed the tests.
Conclusion
This was a fun activity. I know that this sort of thing is prone to error. The many times I’ve installed shower heads and seen them leak are definitely an indication that it does require skill and a tight joint. One of the other students near me had a leak in theirs and had to fix it.
This definitely seems like something that needs a skilled tradesperson to perform, especially for more dangerous substances like gas.