
Installing a kitchen sink drain and faucet
I’ve worked with P-traps and faucets in the past. This workshop at the Tools in the Trades Bootcamp was a great opportunity to test my existing abilities in being able to install a faucet, but I also got to learn how to install a drain.
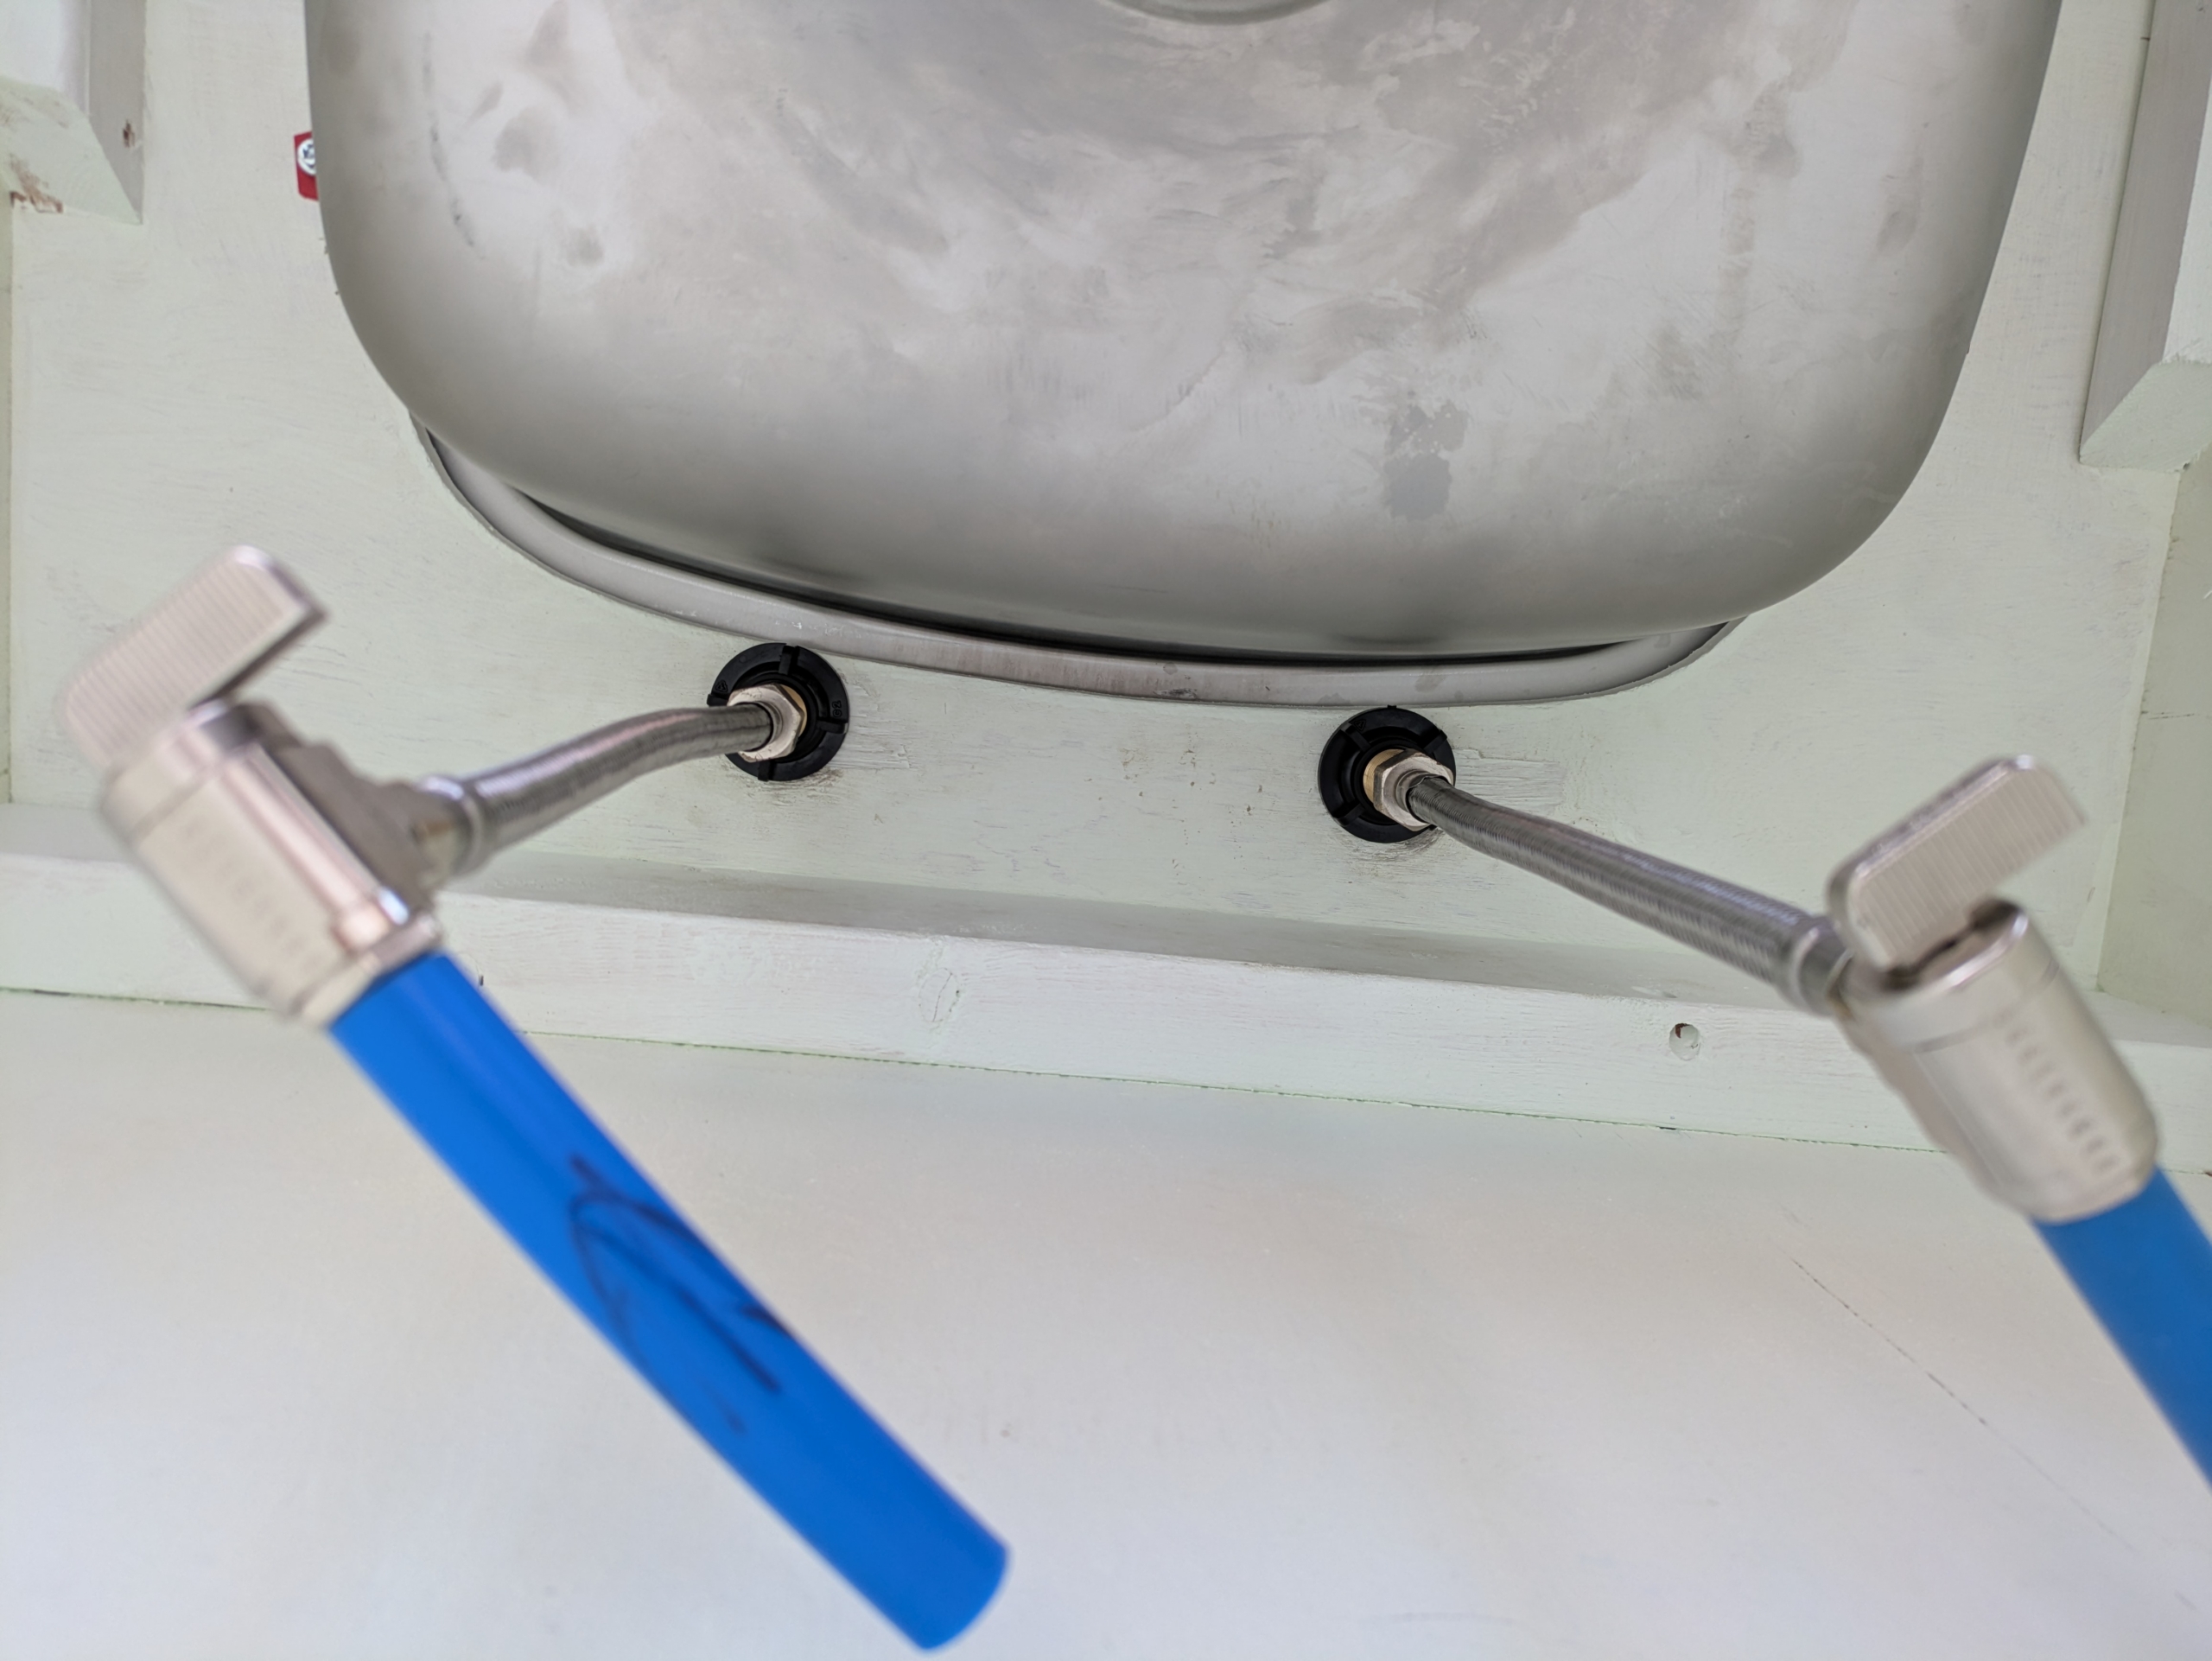
The underside of a sink with faucet supply lines installed
Published July 28, 2026
The featured image was a bit uncomfortable to take—I needed to lie down on the inside of the cabinet, face up looking at the bottom of the sink. It could’ve been worse! If the drain was already installed, I would’ve had less room, so it’s advisable that if you’re installing a new vanity, to install the faucet first before the sink drain.
We were working with the following parts:
- A cabinet with a top-mounted metal kitchen sink placed into the hole
- A faucet
- 2 simulated supply lines that would poke out of the wall (both are blue PEX, which bothered me a bit since the one for the hot water supply line should be red)
- 2 supply lines for the faucet
- Kitchen sink drain and drain pipes
- 2 black plastic circular nuts
It’s possible that some parts were missing for this exercise since everything came unmarked in a giant plastic bin.
Installing the faucet
The first thing to do is install the faucet. You could install the drain first, but then it would be in the way when trying to install the faucet supply lines, so it’s a bit easier to start with the faucet installation first.
First, read the instructions for the faucet! It will come with various parts including plastic circular nuts, supply lines, and gaskets. These need to go on the correct sides of the counter.
There’s a plastic gasket for the top of the counter and directly underneath the faucet to act as a seal to prevent water from falling from the faucet into the hole in the counter.
Then, the part that protrudes below the top of the counter will need to be attached to the water supply lines. Before tightening the water supply lines it’s important to ensure that the faucet is tight against the counter. The two circular nuts provided with the faucet will need to be screwed tightly by hand at the bottom of the counter. One circular plastic nut is for each tap handle (hot and cold). If your faucet has a single valve that shifts directions for hot and cold, there would just be one circular nut.

The underside of a sink with faucet supply lines installed
Installing the drain assembly
The drain is the next part is to put everything together for the drain, putting the correct parts where they go. Most of this assembly is installed from below the sink, and the top of the sink on the inside just has the drain cover.
There are various parts to a drain including a rubber gasket, a washer, and various nuts (plastic and brass).
You’ll see some of that pictured below, but there is an inner part of the drain that is made of brass and is inside of the pipe.
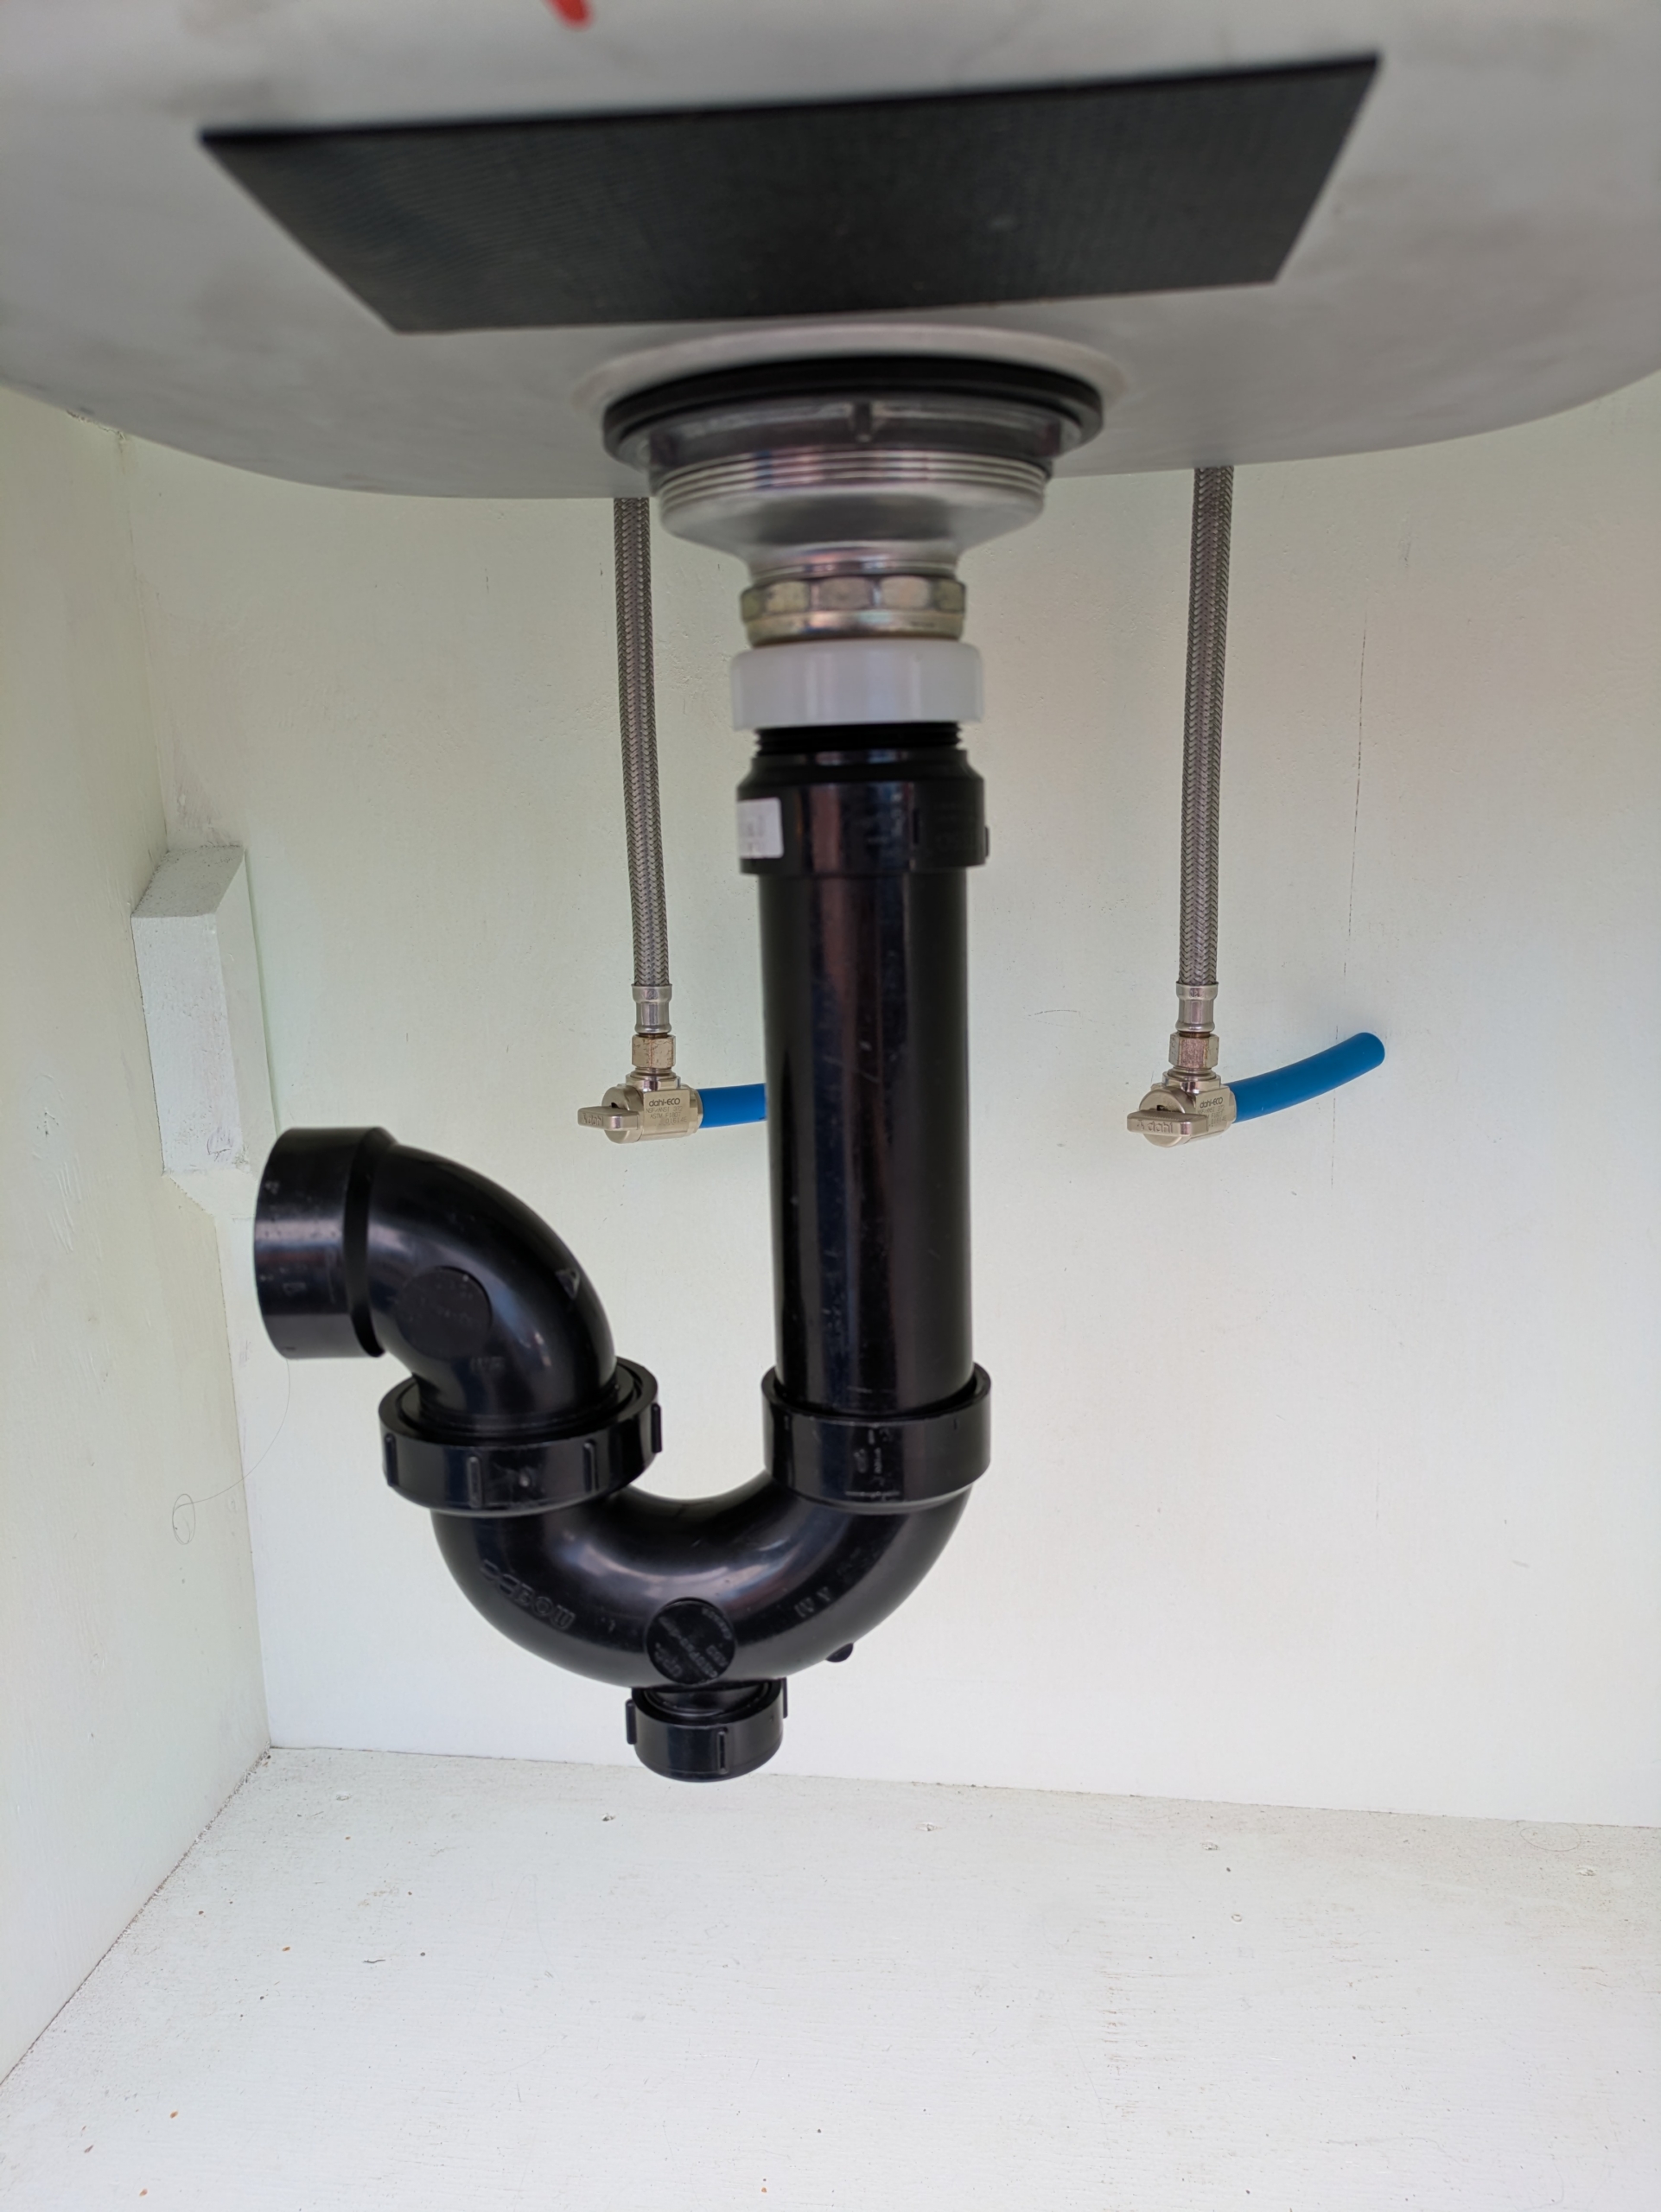
Kitchen drain with black drain pipe and P-trap. The P-trap has a cleanout.
P-traps and clean-outs
The materials we worked with for this workshop included a drain with a P-trap that has a clean-out.
The clean-out can be seen at the very bottom of the P-trap. There’s a little cap at the bottom that looks like the cap of a beverage or condiment sauce bottle. It can be unscrewed and solid debris can be removed from the pipe, allowing you to clean it out more easily. If this clean-out were not present, you’d need to unscrew the drain and take apart the P-trap.
The drain in my condo is made of brass and does not have a clean-out, so when that was clogged by a previous tenant, it needed to be unscrewed with a wrench in order to be cleaned out.
If i need to replace the drain pipes under the sink, I may opt to change out the brass pipes with plastic ones that have a clean-out to make this task a bit easier.